Are you here because you’re interested in taking some great photos or doing a photoshoot in your own space? Whether you’re looking for advice on how to take great smartphone photos or some pro photos on your own manual camera at home, we’ve got you covered! Let us preface by saying that we’re going to go over some great tips no matter where your camera preferences lie! You don’t have to have high-level photography skills to accomplish this, but if you do anyway, we still have tips on how to make your at-home photos even more interesting. Let’s dive in!
Choose Your At-Home Subject
What are you going to photograph?
Your subject will be the person, object, or space that you want to be the main focus of your image. Maybe you came to this blog already knowing exactly who/what you want to photograph, or maybe you came here with the hopes of gaining ideas on what to photograph. We're here to help with every aspect! Before you set up your lighting or rearrange your house, you should determine what you want to photograph.
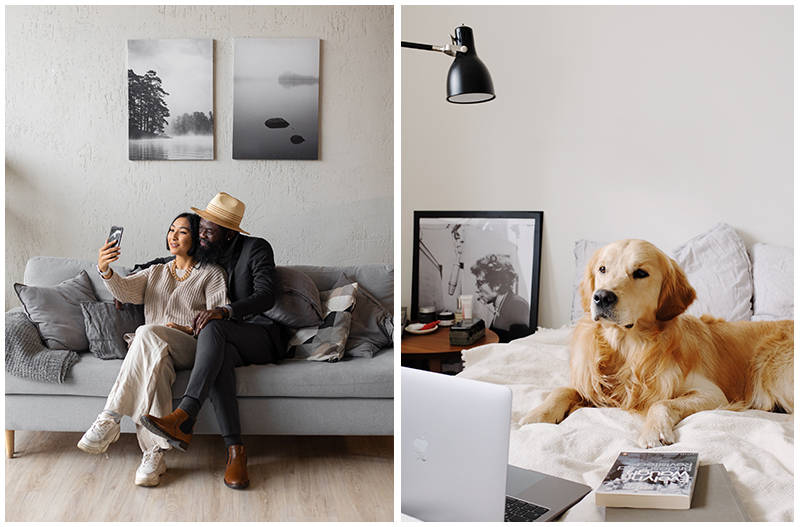
-Is it yourself? (If it is, you'll probably need a tripod.)
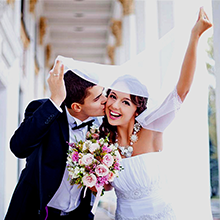
-Is it someone else?
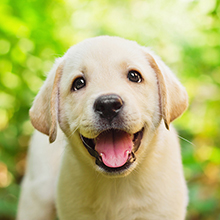
-Is it your very photogenic pet?
-Is it a small action figure or other small object?
-Is it a delicious meal or beverage? (If it is, we've covered food-specific photography in our article "Food Photography Tips"!)
-Is it an entire room in your home?
Knowing your subject will help you decide on how much lighting you will need, how much space you will need, and what kind of scenery you will need.

Lighting! Lighting! Lighting!
What kind of lighting?
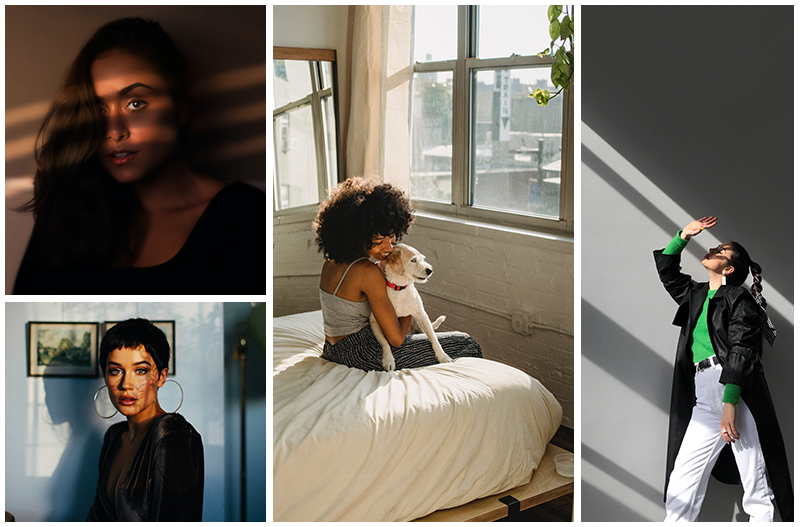
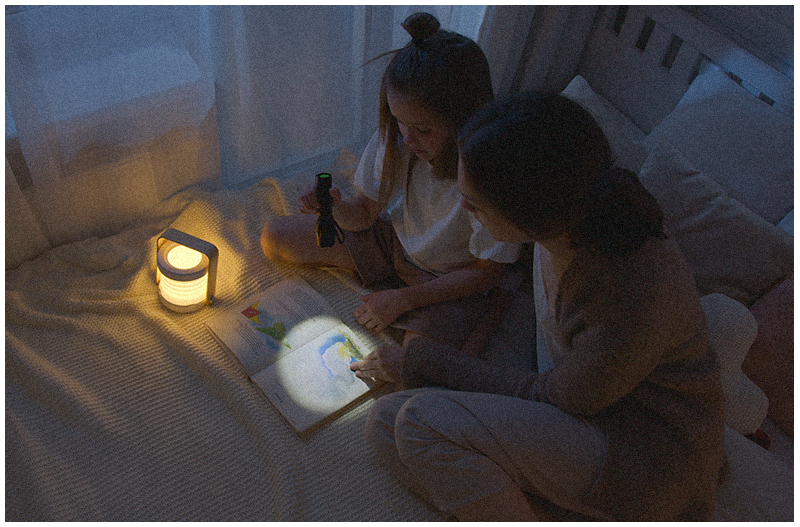
Once you've determined what you want to photograph, lighting is the key factor in beginning to take great photos. If the lighting is off, no matter how creative the photo may be, the whole image will feel off. Artificial light (i.e. lamps, overheard lighting, etc.) will cause a yellow hue over your entire image. Not enough lighting will cause your image to be too dark. And both of these lighting mistakes will distract from anything potentially interesting happening in your photograph. Using natural lighting and/or studio lighting as your light source is the way to go. If you don't have your own studio lighting and you don't want to fret about buying additional equipment, you don't need to! The natural light that beams through your windows will do just fine, and it's some of the best light to use.
How should lighting be used?
Make sure that the front of your subject is well-lit. If using window light, photograph so that the window light is in front of your subject rather than behind. This is the easiest way to using window light effectively. However, if you do decide to have your subject backlit (light illuminating from behind) by the window light, you will need to put a reflector in front of your subject so that the light reflects onto the face of your subject. A reflector can include reflective surfaces like white walls, a white sheet, smooth white poster boards, mirrors, or anything else that can appear shiny or bright! Just be aware that the larger your subject is, the more lighting you will need. For example, if you've chosen an entire room to be your subject, you may need additional lighting other than the one or two windows in the room.
Backdrops to Use
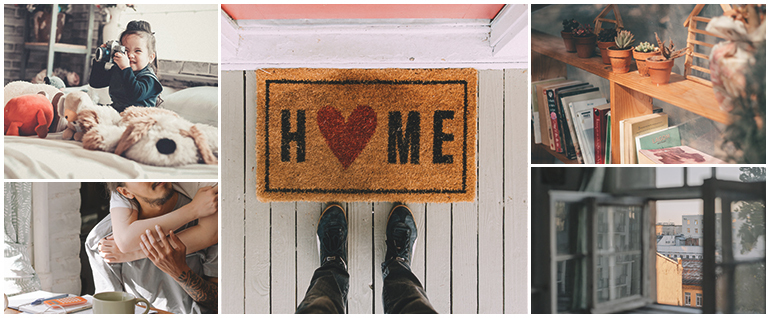
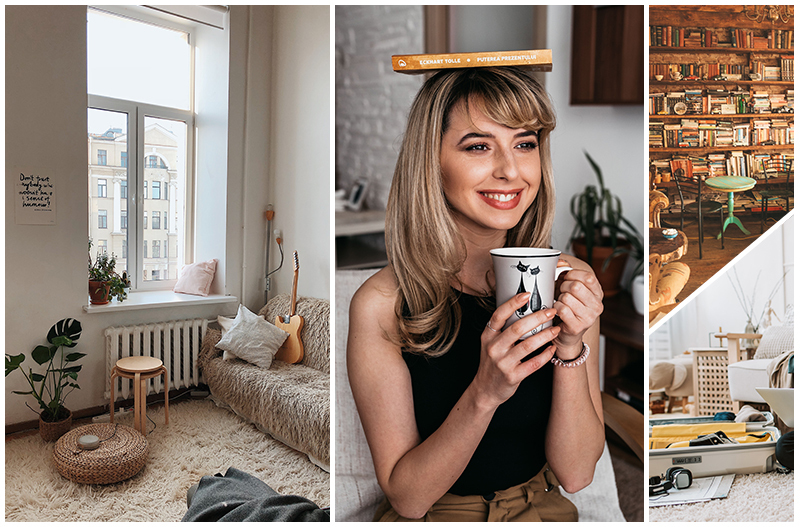
When using the term "backdrop," it is often associated with a professional photographer's studio backdrop, which is typically a roll of material that consists of a solid color or design that is propped up from floor to ceiling (like school photos). But a backdrop is simply the background of an image! If you want a solid color as your background, you can prop up a large sheet or use a solid colored wall. Otherwise, if you want to go for a more natural look, you can use the objects and scenery that you already have in your home.
It's easy for us to find our own homes boring: we're used to our space; we see it all the time. But your home is not boring! There are so many wonderful things in your home that give it life and character: That old armchair, the stuffed animal you won at a carnival in 1999, the blanket that your grandmother knitted for you, that one green wall in your dining room, and maybe even the overflowing laundry basket that's piled higher than you care to think about.
Don't be afraid to rearrange your own space. It's your home, and you can rearrange it to be exactly how you want it! You might have a beautiful bold-colored wall in your home that you want to use as your backdrop. And maybe that's all you want as your backdrop, but... there's a recliner, an end table, a lamp, and a stack of laundry that still needs to be folded. Fold that laundry and don't hesitate to clutter the behind-the-scenes for a few moments while you move all of these things out of the way in order to open up that wall to take that great shot.
Make it Interesting!
Props
Props can certainly be an important part of any photo regardless of the subject being photographed. Every subject can be complimented with a prop or two (or three, or four, or ten...).
Perhaps you're a home decor blogger or you're getting ready to sell your home and want to take the best photos possible of your real estate. If either of these are you, then your subject is probably an entire room (you want the entire space to be the focus). When your subject is a room, props can include a full cup of coffee sitting on a coffee table, a plant on the side of a couch, a cuddly blanket neatly folded over the back of a chair, or canvas prints hanging on the wall above furniture. Now, these might all be considered to be appealing props; you're probably envisioning a perfectly calculated room display like you might see on Pinterest. And these make for super interesting photos! But maybe you don't want to go for that Pinterest feel and you are wanting to go for a more documentary-style of photography. Is your living room full of toys that have accumulated over the course of the past month? Is that cuddly blanket just simply never folded and always on the floor? Did some of the coffee in your coffee cup spill over onto the table? Embrace all of these "props" that may be considered a mess! A photograph of a mess can be just as interesting as a photograph of a colorful, pristine room.
If you're photographing people or animals, a prop can be as simple as a board game (i.e. photographing someone playing checkers) or as breathtaking as surrounding your subject with 100 balloons (pun intended).
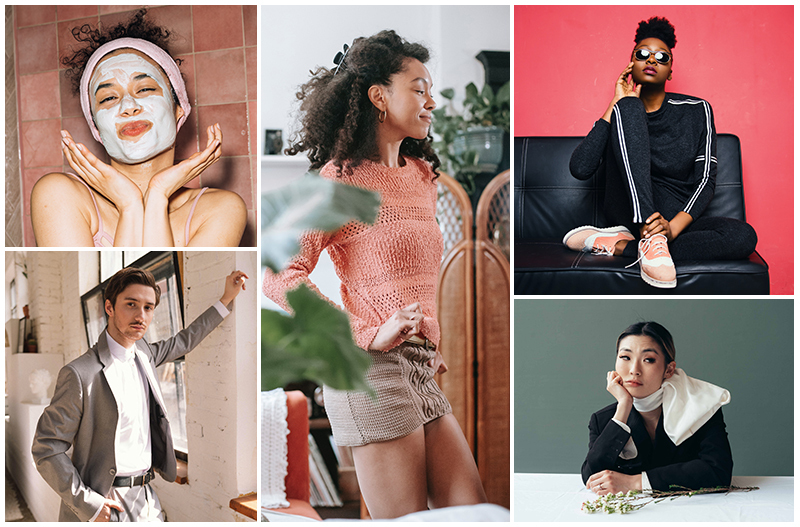
Outfits
This one's for those of you who have chosen a person to be your subject. An outfit can mean the difference between an interesting photo and an okay photo. Let's make it interesting! Going back to the scenario where you might surround the person you're photographing with 100 balloons, make the outfit go with the theme. There are a few ways to do this.. Are all of the balloons light pink? Let's go with an outfit to add some contrast like a dark blue dress. On the contrary, we could go with a light pink dress to match the color of the balloons because a monochromatic theme can be just as interesting. Or are all of the balloons a variety of different colors? Go with the birthday party theme and add a party hat to the outfit!
As a rule of thumb, if you're going with a theme that is being created/rearranged for the sole purpose of a photograph, such as the 100 balloons, then it would likely be best to consciously select an outfit to go with that theme. On the contrary, if you're going with an everyday life, documentary style kind of theme, then it might be best to just let your subject wear the outfit they would be wearing whether they were going to be photographed or not, as you'll want to capture the essence of a raw moment.
Going Pro
Everything we've discussed above can be useful for the photographer using an iPhone camera as well as the photographer using a DSLR camera (digital camera with manual settings). But this section is for the DSLR users looking for additional advice on how to have full control over the the final photograph. If you own a DSLR camera or are considering getting one, there are three important settings on your camera that you should know in order to create high quality at-home photos (or any photo, really): shutter speed, aperture (f-stop), and ISO.
Understanding the Purpose of Shutter Speed
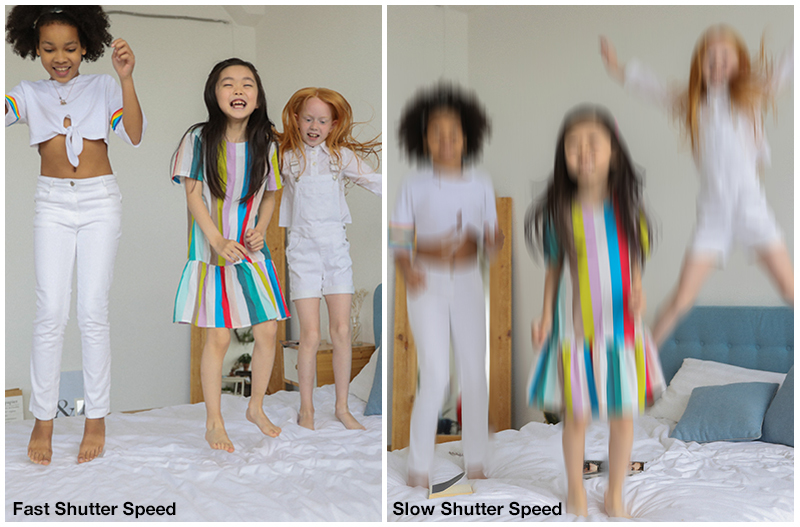
The shutter speed setting on your camera will typically display in fraction form (unless you go with a really really slow shutter speed), and these fractions are referring to fractions of seconds. We won't get into too much of the technicality of it for the purpose of this article, but this is the most important thing to take away: The slower your shutter speed, the lighter your image will be as well as the blurrier any movement in your image will be. That said, for the purpose of taking photos in your home, we can't tell you a specific shutter speed to use, as that will depend on your space, your camera, and what you're going for, but we can give you solid advice.
As a rule of thumb, unless you're using studio lighting (or you're photographing in your sunroom), the overall space will likely be darker than if you were photographing outside. To make up for the lack of light, you might want to use a slower shutter speed than you would if you were outside. Typically, if you go slower than 1/60 for your shutter speed, any movement will result in a blur. Unless you want your entire image to be blurry (think camera shake), you'll need a tripod for a slow shutter speed. If you want to freeze movement in your image (i.e. you want to photograph someone in mid-jump but you don't want them to be blurry), then you will need a fast shutter speed such as 1/250 or possibly even faster. But remember that a faster shutter speed will make your image darker. To make up for this, you will need to adjust the other settings on your camera, such as your aperture and ISO. If you are interested in understanding more of the ins, outs, twists, and turns of shutter speed, we recommend checking out this article by Adobe here.
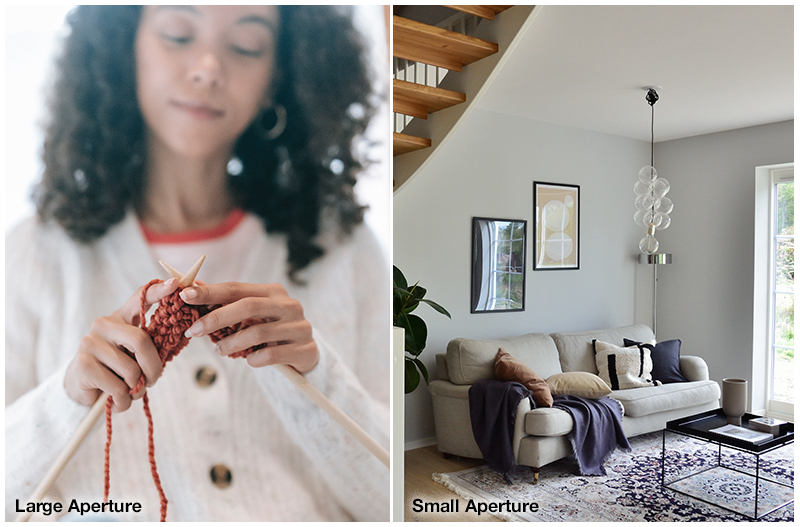
Understanding the Purpose of Aperture (F-Stop)
The aperture setting on your camera, also known as the f-stop, will display as whole numbers and decimals that are preceded with the letter "f" (i.e f/5.6). Again, we want to keep things simple (we are Simple Canvas Prints after all), so we won't get into too much of the technicality of it. Here's the most important thing to know about aperture: The larger your aperture, the lighter and the shallower the depth of field in your image will be. You might be wondering what a depth of field is.. In simple terms, it's everything from your foreground to your background (i.e. the person standing right in front of the camera is the foreground and the couch behind that person is the background).
A shallow depth of field means a shallow focus. That said, a larger aperture is great for doing portrait photography or any close-up photography, as this will allow the focus to be only on the person (or pet) in front of the camera and everything in the background will be blurred. And BONUS: a larger aperture will also make your image lighter, which will make up for the lack of light indoors. However, If your subject is an entire room, such as real estate photography or home decor blogging, then you will benefit more from a smaller aperture as this will allow both foreground and background to be in focus. But keep in mind that using a smaller aperture will take away light from your image. That said, you will need to make up for this by adjusting the shutter speed and/or ISO accordingly. To get a more in depth understanding of aperture and depth of field, we recommend checking out Photography Life's article here.
Understanding the Purpose of ISO
The ISO setting on your camera is in charge of how much light your camera allows in. In other words, it does what the shutter speed and the aperture settings do, but without messing with the depth of field or how movement will be captured. Here's the main thing you should know: The higher the ISO setting, the lighter and noisier your image will be. There are different benefits to different ISO settings, but typically an ideal range is between 100 - 800. Beyond ISO 1600, your image may start to get noisy. The simplest word to describe noise is graininess, and this may or may not be a bad thing depending on what you're going for. (Check out Photography Life's article here if you're interested in learning more about noise.) For the purpose of indoor photography, assuming you're working only with the natural light coming through the windows, you will likely need to use an ISO of around 400 or higher, depending on how close your subject is to the window light.
Now, like we said before (and we'll say it again), you do not need to be a professional photographer or know how to use a DSLR camera to take great photos at home (but that is a plus)! Your smart phone and the natural daylight coming through your windows will still allow for some good pictures. Whether you're planning to take a selfie, DIY your own scene, or simply capture a raw moment, we hope that this article has served as an inspiration for you on how to take better photos at home! And if you need any canvas prints to use for your backdrop, we've got you covered.
| GET STARTED |